World of van helsing Deathtrap is an excellent example of an action tower defense game. This game focuses heavily on strategy. You get to pick from 3 characters who are very different in skills, strong points and difficulty. This time we will look at the Marksman.

The Marksman is considered the hardest to use of the 3 characters. Forget considered! He is without a doubt the hardest to use. He has been even called the worst of the 3. Again we understand completely but why? The Marksman has the second smallest amount of health. Just 100 hit points more than the Sorceress. So we know that he can’t take a hit. His main attack skill ‘Shoot’ literally tickles the enemies. Simple enemies like the ‘Kobold Wartfiend’ take too long to defeat for such a weak enemy. His other skill that does more damage is ‘Poison streak’ which also poisons the enemies and pierce through them but it’s damage is also very low and it’s focus cost is high enough to only allow two shots at a time. So not only can the Marksman not take a hit but he can’t give one either. The worst thing about him is his, let’s call it ‘ability system’. The Mercenary and the Sorceress regenerate (rage/mana respectively) when not being hit and from basic attacks. The Sorceress even has ‘Arcane retaliation’ which grants her mana whenever she is hurt but the Marksman is so different. He never regenerates Focus unless he is cloaked. He can only be cloaked when a certain distance from an enemy for a certain period of time. Even then it recharges slowly. This sucks, as you can fire two poison streaks, then run away to prevent death and wait an extra while to get some Focus back, all the while, the enemies are making their way to the gates. Most players struggle to even get 3 stars on their first few missions because there is no way of stopping the horde with a limited use of special skills, very little damage and can’t even use your body as a shield to defend the gates.

So the Marksman is garbage right? X35 Earthwalker had a theory and yes you could call it a game theory. He said that the Marksman has to be one of those characters that suck at the start but are very good later tier. It turns out that was true. Marksman is literally for the most strategic gamers and those willing to endure some tough matches. Tier 1 skills for the Marksman isn’t great and we are being nice about this. Tier 2 has two useful skills ‘Scattershot’ and ‘Trap boost’. Scatter shot is perfect for taking down giants and armoured enemies and should not be wasted on horde and normal type enemies. Trap boost is simple. Just select a trap to make it do more damage. Tier 3 is where the good stuff are at. Here you get access to the HIGH damaging skills ‘Grappler bolt’ and ‘Shock bolt’. Grappler bolt does the higher damage of the 2 and pulls nearby enemies to the original target together and slows them down. Shock bolt costs no focus at all and still does really high damage. You also get the trap skill ‘Overdrive Sphere’ which reduces the time it takes for a trap to reset for a period of time within 10 meters of your character. and world skill ‘Overdrive’ which reduces the time it takes for a trap to reset for a period of time. These can be deadly. Don’t waste time with ‘Incendiary Barrage’ as it costs far too much focus to the point where you can use it once and then need to get more Focus. We are sure it becomes immensely powerful once upgraded but when you are at the point of unlocking tier 2 skills and stuff you have to prioritise over things to survive and actually win in some levels. Right now it’s all about: Shoot, Scattershot, Grappler Bolt, Shock Bolt, Overdrive Sphere and Overdrive.

What’s the strategy then with the Marksman? Well it’s to keep firing at all times from a distance and know when to go cloaked to regenerate your Focus. Always start a wave near the gates of where the enemies come from. Always fight near a teleport pad so you can move to where you need to be quickly in case of emergencies or anything else. Whenever Shock bolt is available just use it. It’s powerful enough kill many enemies outright and therefore saving you time. It recharges in 3 seconds but if you are like X35 Earthwalker and always play in times 2 speed then it’s really 1.5 seconds. Plus it doesn’t require Focus so literally use it as soon as it is available. Sort of the same with Grappler bolt but watch your Focus as it uses a little bit of it. Use it on horde and groups as a higher priority but regardless, just use it. It’s stronger the Shock bolt. Scatter shot must be used on giant and armoured as it destroyes them quickly and doesn’t cost too much. Invest points to allow it to pierce through enemies for total destruction. Max out ‘Concentration’ and ‘Ambush stance’ so you have maximum amount of Focus to use your skills and get cloaked faster and regenerate Focus faster while cloaked. This makes a big difference. Max out the ‘Shoot’ skills ‘Splintering’ Bolt skill to make it have area of effect which makes shoot actually not bad anymore and can hold it’s own against horde enemies. Overdrive and Overdrive Sphere are best used with ‘Gun Sentry’ traps as it turns your guns into machine guns but combine both skills and your machine gun becomes a mini gun. Make sure your guns have area of effect and increased damage and they shread everything. Trust us. That’s the game plan here with the Marksman. Once you know what to do and have the tools he actually becomes very powerful.

Overall the Marksman is still the worst character in our opinion overall due to the sheer difficulty of using him initially. Sure he is actually very powerful late tier but many give up on him before even getting there. Late tier he may be the most powerful. We’ll find out. We say hold and and don’t give up. Plus his voice and look is pretty cool though, you have to admit. Imagine your school teacher sounded like him. So give the Marksman a try and master him for yourself. Watch X35 Earthwalker himself play it on his livestream. Follow us on twitter and Beam to know when he will be doing it. Let us know of any strategies you come up with. Regardless of what you come up with it can never be better… than the ‘Earth Walk!’

For more information check out the link below:

X35 Earthwalker has been playing World of Van Helsing: Deathtrap  for a good while now and has been using all three character classes which are: Mercenary, Sorceress and Marksman. For now we are going to focus on the Mercenary and Sorceress only. Both classes are powerful in their own way and have different combat styles to consider.

The Mercenary is a the big strong, durable guy. He is simple to understand and simple to use. He has lots of health, able to stand up to the hordes and brawl it out by himself. No player has any excuse for dying as a Mercenary. With that much health, there is no excuse. In terms of armour, accessories and weapons the best thing to do is aim for increasing his resistance to damages and how much physical damage he can give as much as possible. Don’t worry too much about traps as the real monster in the game is the Mercenary. Traps are there just to slow down and soften the horde up for you. X35 Earthwalkers Mercenary has such high health and resistance that some enemies are just incapable of killing him. There was this Quag devourer champion which kept hitting X35 but it did so little damage that his regeneration kept healing him faster. X35 ended up just standing there for a while laughing at the fact that this creature would never kill him, even in an hours time. Having extremely high physical damage + the Bash ability = the strongest move in the game. X35 Earthwalkers Bash ability currently does 15563 damage per hit, which is absurd. Champions and even bosses die quick in his presence. The mercenary isn’t weak against horde enemies at all. Hordes are countered mainly by two abilities: Frost ring and Fire strike. Frost ring is the ultimate ability that every Mercenary player should have. It creates a powerful ice ring around you that hits everything around you rapidly at a generous range and even a chance of freezing them. Fire strike sends a trail of fire that passes through anything in it’s path dealing heavy fire damage. Both abilities can wipe out hordes with one use. The mercenary isn’t a joke.

The Sorceress is the soft, gentle but seriously powerful lady. She is sort of difficult to use but still easy to understand. She has little health. So there is no reason why your Sorceress should be receiving hugs from the horde. She has to stay at mid to long range obliterating everything. Her ice bolt is your main means of annoying the horde. It does nice damage but also freezes horde and normal enemies but slows down horde and giant enemies. Spam the ice out of that move! Lightning is your horde control. It deals heavy damage to everything it hits as it passes through enemies and stuns them for a very short time. The best type of armour and accessories for her are health and damage. Extra health will at least help her survive longer in the field, especially when dealing with ranged enemies while the damage is pretty obvious. She hits hard already but when you increase that (like lightning damage) her attacks can end up one shot-ing lots of enemies. She is the best map controller as she has abilities that stay active on the field for a while such as: Spectral serpent and Spool of fire. Spectral serpent creates a snake that sits there and fires poison damage at enemies that come by. Spool of fire creates a fire pillar from above that tracks enemies and deals continuous fire damage. Plant a spectral serpent and spool of fire on one lane while you go and focus down another lane. Both abilities combined will give the horde lots of trouble. One of her most versatile abilities is Teleport. This can be used to make her travel much faster around the map as it’s faster than running. It can also allow you to jump from lane to lane instead of following the path, saving you travel time. Also once upgraded you can travel seriously far, heal per teleport and inflict damage on the enemy. The Sorceress is pretty… pretty dangerous if you ask us!

So who is better at what? The Mercenary has much higher health and has the highest damaging move in the game. The Sorceress is faster and has greater mobility thanks to Teleport. The Sorceress can freeze enemies with Ice bolt but so can the Mercenary with Frost ring. The Sorceress can  jump between lanes and cross big gaps in an instant thanks to Teleport once again while the Mercenary must always take the long way. The Mercenary has more versatile skills. For example he has Bash for heavy damage, Frost ring for hordes, Chain snare to pull enemies away from the gate and straight into your fist and Battle roar to make all allied creatures crazily powerful. There isn’t a situation that a Mercenary is bad at. He can even use himself to block enemies from reaching the gate due to his high health. Lastly he has two great passive abilities that increase the health and damage of all allied creatures. The Sorceress has better map control thanks to Spool of fire and Spectral serpent allowing her to be handling multiple lanes at once. Her long range attacks also means she can attack across lanes and her Teleport means she can be anywhere very fast while healing herself. Lastly she has many passive abilities for increasing the damage that traps deal meaning she brings high pain from everywhere and once combined with a high level Icy wind, can attack every enemy everywhere.

Overall X35 Earthwalker himself prefers the Mercenary as he is the more obviously powerful one who can stand up to any monster with tools to handle any situation making him the better class but that doesn’t mean the Sorceress is inferior as she has more amazing and cool looking abilities making her exciting to use. A sorceress backing up a Mercenary is just scary. Whether you agree or not… just know that it’s all about the ‘Earth Walk!’

For more information check out the link below:

More information

World of Van helsing: Deathtrap is an excellent strategy game and a lot of fun but near towards the end of the game it starts to become less fun and more frustrating. This is due to how difficult some of the levels are in tier 4. Especially the last 3 levels: Necropolis, Wonded Crag and Inkheart. X35 Earthwalker himself has beaten every level in tier 4 and he will give his views and some advice and tips concerning the levels and what to do.

“The last 3 tier 4 levels defeated me at my first try. They all seemed overwhelming as the enemies literally end up swarming you. Almost any enemy you have faced already will be present and back for revenge. For them, revenge is a dish best served in numbers. By the time you unlock tier 4 levels, you should be at least level 50 by then. The higher your level, the more skill points you can spend on your skills. The skills you bring into these levels are essential. Skills that make your character a man/woman army are needed as you have to be able to handle the battlefield yourself or at least one section on the level by yourself. For example, as the Mercenary having the bash and frost ring abilities are essential and will save your life. I will talk about this as a mercenary character. So make sure to have trap boost, touch of death, frost ring and bash. As other character leaders you must have at least one trap enhancing skill and a heavy hitting skill for serious damage.”

“The first tier 4 level that we will talk about is Necropolis, which looks like a giant cemetery (how fitting). This level is so hard simply because they through many different types of enemies your way. You will have to deal with horde, giant and armoured enemies. This means that splash, concentrated and piercing traps are needed. In the you should handle the giants that come from the top right gate by using ONLY concentrated traps. I used the gun sentry and frost pillar. This slows down the giants while dealing heavy concentrated damage. Make sure to max out the damage and slow for the gun sentry and frost pillars. Activate the top right and left enhancer beacons. Then built two razor launchers next to the top left gate as preparation for later waves. Lastly if you have some essence left, head to the top square section of the level and on the left hand side build a phoenix tower and blast furnace to handle horde enemies that come from the gate at the top gate. You must stay and handle the enemies from the top gate yourself. The next wave just upgrade your razor launchers on the top left path and along that path build lightning pillars build a razor launcher right in front of the enhancer beacon at the bottom left gate location. Handle the monsters from the top gate and only leave when you absolutely have have to. Keep an eye on the map so you can go and deal with the quag devourer champions that come at the end of the wave. Build concentrated traps along the path of the bottom right path for giants that come later. Wave 4 is the worst. The biggest threat are the glacier golem who will freeze you when they die if you are near. That’s why we built pure piercing traps on the left hand side as lots of armoured enemies will show up. Here you must know when to leave the top gate and assist in other places, primarily the glacier golems. It’s up to you now. If you can pass this wave then you can pass the final one. Just don’t panic and make sure to check your map often. I left a quick game play clip below to check out.”

“Wounded Crag is just simply a ridiculous tier 4 level as they it throws more enemies than your traps could ever handle. There is no fixed build for this level as the monsters change which gate they come from each wave pretty much. Good thing is that there are only two types of enemies here: Shredders and Drigiblusa (I hate those things). This means only build concentrated and piercing traps like the frost pillar and lightning pillar. Funny enough, this map only has tower traps slots anyway. You could use Enthropic tower but the giant enemies normally have quite the distance between them making the jump ability of the beam not effective. So that’s the main of it. You must build as much as possible and make sure to have slow and damage upgraded to max on all frost pillars. The lightning pillars need max extra charge and multi-jolt. Any slots that are too out of range for those two towers should be used for a olympus tower as has magnificent range. The strategy is to literally use as many trap slots as you can, building lighting and frost pillars, to damage as much as you can, weakening the enemy for when they encounter your character. Build as best as you can but in the end, it all comes down to your character and the skills you use. You have to manage this map and head everywhere to assist your traps literally. You could in the later waves sell to swap the locations of your piercing and concentrated traps but if you decide to do that then I recommend that you only do that once as towers sell for less of their original value after being used. Check that map frequently for sneaky monsters and always fight near teleporters so you can get to places quick to save the day. I failed to get three stars on this level at least twice, so don’t get discouraged even if you fail the level. See where you went wrong and then do what needs to be done. Hey, I never said that tier 4 levels are easy. So stop moaning and get good!”

“Inkheart is the true monster of this game. This level went over the scale in every way. You must deal with pretty much ever enemy you have faced already. Fast horde monsters, multiple armoured enemies including those glacier golems, giants in abundance, high damaging enemies, many inkwraiths (just in case you missed them) and multiple bosses all want to have a swing at your face. To beat this level, you have to use every trap slot and special trap available. This is non-negotiable. If you didn’t use one then you are dead. The scary part is that even if you use them all, you most likely will still be dead. It’s that hard. Even worse is that they don’t give you nearly enough essence to prepare for death. Your only hope is to use all the salvage recyclers which grants essences during attack waves. For the first wave build at least two salvage recyclers at the start. It’s up to your character to hold of the horde and build up essence. Then as the first wave continues build the other salvage recyclers. The trick for this level is to stall for time as long as possible so that you can get as much essence as possible. So let a lone monster walk as far as it can go. The last monster should be a quag devourer which are slow. So troll this monster as much as possible by running around it to dodge attacks and even take a few because while it attacks it stays still. Use your body if you have to, to buy time. Get hit to low health then run away to quickly heal and then go back and keep dodging attacks for as long as you can. Eventually the amount of essence you have will be well over a thousand! Then when you can no longer stall the creature, kill it.”

“Always get the service station special traps first then get the summoning traps. I suggest maxed out archer posts at the very most front to deal crazy damage then monster cages at the next line of traps, then right behind them more archers. Use the monster cages to shield and protect the archers. Monster cages once maxed out have extremely high health making them the best at stalling for time and holding back the horde. The archers must have maxed area damage and creature limit. On the floor with the line of summon trap slots just in front of the three paths to the gates we must protect, build a monster cage in front of archers. Again, you must use every slot and every special trap. EVERY SINGLE ONE! Off course having all monster cages might work for you or all archer posts. It comes down to your character and style. You may have to reset your leader and trap skills so that you can put as many stats as possible into your summon traps. As for leader skills I had maxed out sigil of inspiration, touch of death and battle roar as once combined with archers make the most powerful combination ever. Sigil grants bonus damage of over 500%, touch of death increases physical vulnerability to 112% while battle roar increases damage by 380%. That’s crazy damage. Crazy damage for a crazy level. I will run by groups of archers that many enemies are coming by and use sigl of inspiration and then head to my area to fight the horde. When a whole army is approaching you and the archers then use touch of death and battle roar and watch your enemies literally melt away. The last wave requires good timing and multi tasking skills. This last wave literally swarms you with numerous enemies all at once. Bosses, giants, hordes and more. It all comes down to you at that point. I trust that my advice has been useful.”

“Some of you might be wondering about my tower stats so I included a picture below”

Overall this will be one serious challenge for any gamer. The last three tier 4 levels are literally a step up from the others. You just have try. We at X35 Earthwalker personally think that the last level especially is too hard and ridiculous in what it throws at you but it can be done as others including X35 Earthwalker himself has done it so give it a try… also go try to do the ‘Earth Walk’!

For more information check out the link below:


In World of Van Helsing: Deathtrap there are a total of 25 different traps for the player to unlock and use. You initially start of with 4 traps: Lava grill, Acid geyser, Lightning pillar and Gun sentry.  You can unlock the others by fulfilling certain requirements like poison 600 enemies or inflict 15,000 fire damage and by completing a certain amount of levels. There are more traps though in the game known as special traps which only appear on certain levels. You cannot create them yourself. Many of these are truly traps of Death.

X35 Earthwalker has unlocked all the traps in the game and used them all and said, “Only 15 of the 25 traps are useful.” This is a big statement and while it is primarily due to his style of play, it’s also because of how they stack up against other traps, which is something we will talk about later. At the end of the day it is up to the player to figure which traps are good and useful to them and their style. Some of the traps just give out damage, while some cause effect damage while others are do no damage but just there to assist you in some way, some summon creatures to help you and some help you not mainly in damage but due to it’s unique effects.

As you should know the traps are split into five groups: Mystical ground, Mechanical ground, Mystical tower, Mechanical tower and Summoning. Let’s start with Mystical ground. The lava grill is a splash type trap that that deals continuous fire damage but once upgraded can set enemies on fire and even disorientate your enemies. Icicle field causes ice damage and slows the enemy down for 5 seconds but once upgraded, has a chance to freeze enemies for 5 seconds and make them more vulnerable to ice attacks. Stasis trap uses three stasis bubbles to trap and hold enemies in place for 5 seconds and deal good physical damage but once upgraded can hold them for longer and deal bigger damage. Abyss crater has a chance of instantly killing ‘horde’ and ‘normal’ enemies but those not killed instead just take damage but once upgraded can deal area of effect damage. The portal glyph is unique as it has a chance to send an enemy back some distance along the path they came from but once upgraded can deal damage also and make them more vulnerable to lightning attacks.

Now for Mechanical traps. Acid geyser is a piercing type trap that deals poison damage while making the enemies more vulnerable to physical attacks but once upgraded can afflict enemies with the poison status. Spear trap is a piercing type trap that simply impales enemies with spears dealing heavy physical damage but once upgraded able to poison enemies also. Essence trap is unique as it does no damage but enemies killed within its range generate more essence more normal and when upgraded they have a chance to stun enemies that step on it. Spring trap knocks enemies down, harming them and slowing them down but if an enemy is knocked of a ledge then it instantly dies but once upgraded can make enemies more vulnerable to fire attacks. Tick mine Dispenser has a small chance to attach a bomb to an enemy and when that enemy dies the bomb explodes with heavy area of effect damage but once upgraded can set a space on fire. 

Now for Mystical towers. Lightning pillar is a piercing type trap that creates charges every 3 seconds which it uses to attack enemies at double the normal rate of fire but once upgraded can hit multiple enemies at once. Frost pillar is a concentrated type trap that shoots a beam at a single enemy continuously damaging them and slowing them down but when upgraded can freeze enemies it hits. Phoenix pillar is a splash type trap that launches a fireball to deal area of effect fire damage and capable of knocking enemies down if deals 25% of enemies health worth of damage but once upgraded can ignite enemies. Enthropic pillar is a concentrated trap that shoots a beam at a single enemy continuously harming them. 20% of the damage is returned to player or ally creatures as health but when upgraded has a chance to hit multiple enemies at once. Olympus pillar strikes an enemy with a thunderbolt that deals area of effect lightning damage after a 2 second delay of original place of target but once upgraded can reduce the delay.

Now for Mechanical towers. Gun sentry is a concentrated trap that fires at a enemy continually until it is out of range or dead but once upgraded can do area of effect damage and slow down enemies too. Razor launcher is a piercing trap that fires razor sharp discs through enemies hitting others behind them but when upgraded has a chance to fire multiple discs and increase the damage dealt to enemies behind original target. Blast furnace is a splash trap that shoots jets of flames in all four directions which also ignites enemies so they take damage over time but when upgraded can make enemies more vulnerable to fire damage and increase burn damage. Voltaron coil electrocutes all enemies within range and the shock can jump to other targets, dishing out more damage but once upgraded can make the electric arcs jump more times. Cannon sentry is a splash trap that fires explosive shells and has high area of effect but once upgraded can have a faster rate of fire and faster shell speed.

Now for Summoning. Monster cage summons a werewolf (we think) that runs at near enemies and starts swinging at them. They have high health meaning they are good for stalling for time but once upgraded you can have 4 of them with a chance that a rare more powerful wolf will show up. Reanimator pit has a chance to summon a ghoulin when an enemy dies near or in the pit. This is good for areas where lots die there as you could get continuous monster summons, slowing down and stalling the enemy like no other but once upgraded the ghoulins can be stronger and stay around longer. Archer post summons up to 3 archers one by one who have great range and fire high damage arrows but once upgraded they have a chance to dodge none area of effect attacks, have more archers and their arrows do area of effect damage. Suicide swarm nest summons suicide spawns who run at enemies and attack them and when they die they explode dealing 1000 poison damage but once upgraded there is a chance of an instant respawn and greater range of explosion. Winter queen sigil summons a winter queen spirit that uses blizzard spells to deal ice damage to enemies at great range but once upgraded has reduced cool down for blizzard spell and increased damage.

X35 Earthwalker himself only seems to use: Lava grill, Acid geyser, Lightning pillar, Gun Sentry, Monster cage, Spear trap, Razor launcher, Stasis trap, Essence trap, Phoenix pillar, Blast furnace, Archer post, Enthropic pillar,Olympus pillar and Cannon sentry. Gun Sentry traps are best used in groups as when together they can shred anything to bits. If you have 3 Gun sentry traps that have maxed area of effect and damage, even horde type enemies will get owned. These are the traps that are good for almost any situation. The Acid geyser is best used in front of other traps that deal physical damage like Razor launcher or spear trap as the acid increases their vulnerability to physical damage. Matter of fact have a mercenary keep the enemy busy on top of a Acid geyser trap while Gun sentry traps continue to deliver the pain with increase physical vulnerability. When almost every time you see a spot for a Summoning trap, always build archers as they deliver fantastic damage from a good distance and once enemies get close they can stall for time buying you precious seconds. Olympus pillar has the largest range in the whole game and therefore can strike enemies from different paths and lanes with heavy area of effect damage meaning it’s good against boss enemies and horde. 

He doesn’t use the Icicle field because it delivers the lowest amount of damage of all towers and it doesn’t look like its slowing enemies down at all. The Stasis trap is superior in every way as it doesn’t slow down but keeps them in place and deals way more damage. Stasis > Icicle field. He doesn’t use the Frost pillar as it is inferior to the Enthropic pillar in most situations. It does less damage than Enthropic and it’s effect is not as useful as it doesn’t slow the enemy down by much visibly but the Enthropic actually heals the players and their allied units if nearby keeping you in the fight and able to bounce the beam unto multiple targets for more damage. Once upgraded though, the frost pillar becomes quite powerful and essential on one some levels. Enthropic pillar > Frost pillar (most of the time). He doesn’t use the Reanimator pit as it relies on others killing for it to activate and even then the activation is by chance and not guaranteed; furthermore the summoned monster after the chance is the weakest of all summoned monsters and deal the least damage. So not worth it. Any other summon monster would be useful almost all the time except the Winter queen sigil. He doesn’t use the Abyss crater as it has a low chance of instantly killing enemies with investing so much points in upgrading it. If it doesn’t kill, the damage it gives is really low. On top of that any enemies instantly killed do not give you any essence which you need in this game to build other traps. He doesn’t use spring trap as there are other traps that do better damage and at times the trap (depending on the location of the enemy) launches enemies forward a bit. It should only be used on narrow paths for a chance of knocking them off the edge. It’s not worth it. He doesn’t use Tick mine Dispenser as it has a really low chance of attaching a bomb to an enemy and that bomb is only useful if the enemy with the bomb is killed near others and the damage is not all that impressive when an upgraded Spear trap deals more damage and even poisons them. He doesn’t use the ‘Voltaron coil’ because it is either outclassed in damage or usefulness. It’s best against groups of enemies but the ‘blast furnace’ works better. Even with upgrades it seems like a waste of essence. The winter queen sigil trap is the worst thing ever. It does so little damage and takes too long to attack. Why is this even one of the last traps to unlock like it’s something special. Maybe he is using it wrong, we don’t know. Literally anything is better than this. Any summoning trap will do. Now ‘suicide swarm nest’ and ‘portal glyph’ aren’t bad, it’s that their use is so rare and limited that he hardly uses them. Mostly to show off or rarely, they are actually needed.

In this game you are truly dependent on your traps and so you must know them very well. Check out each trap and try out each trap. Who knows, you may find a trap that X35 Earthwalker never uses to be one of the best in the game. 25 is a lot to work with and we haven’t even mentioned the ones that are specially placed on certain maps. Maybe next time. Now you can see whay some are truly traps of death. Have fun and off course… do not forget to do the ‘Earth Walk’!

For more information check out the link below:

More information


If you haven’t been playing world of Van Helsing: Deathtrap yet, then shame on you. Seriously, this is a great game and wonderfully done. Now one thing that is for certain is that this game is built quite heavily around strategies and timing. That’s what you would expect from a tower defense action RPG but this game does it exceptionally well. We decided to share some information, tips and strategies from X35 Earthwalker, the master strategist himself.

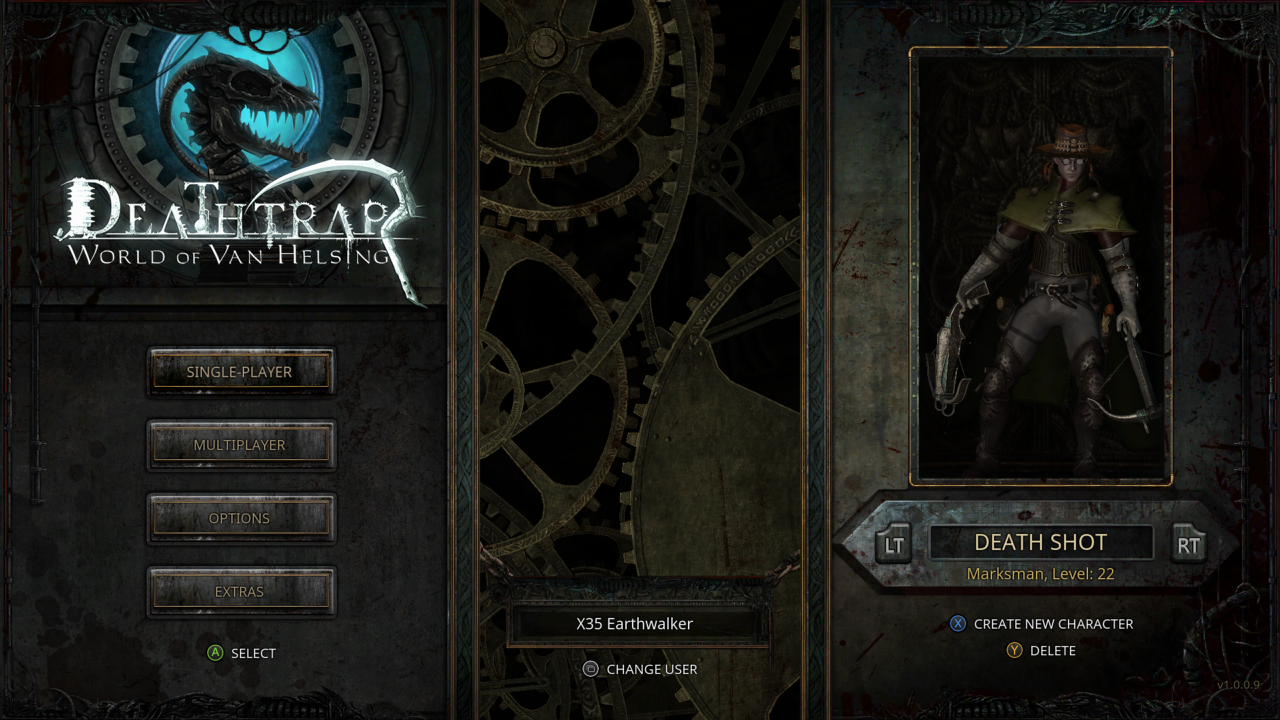
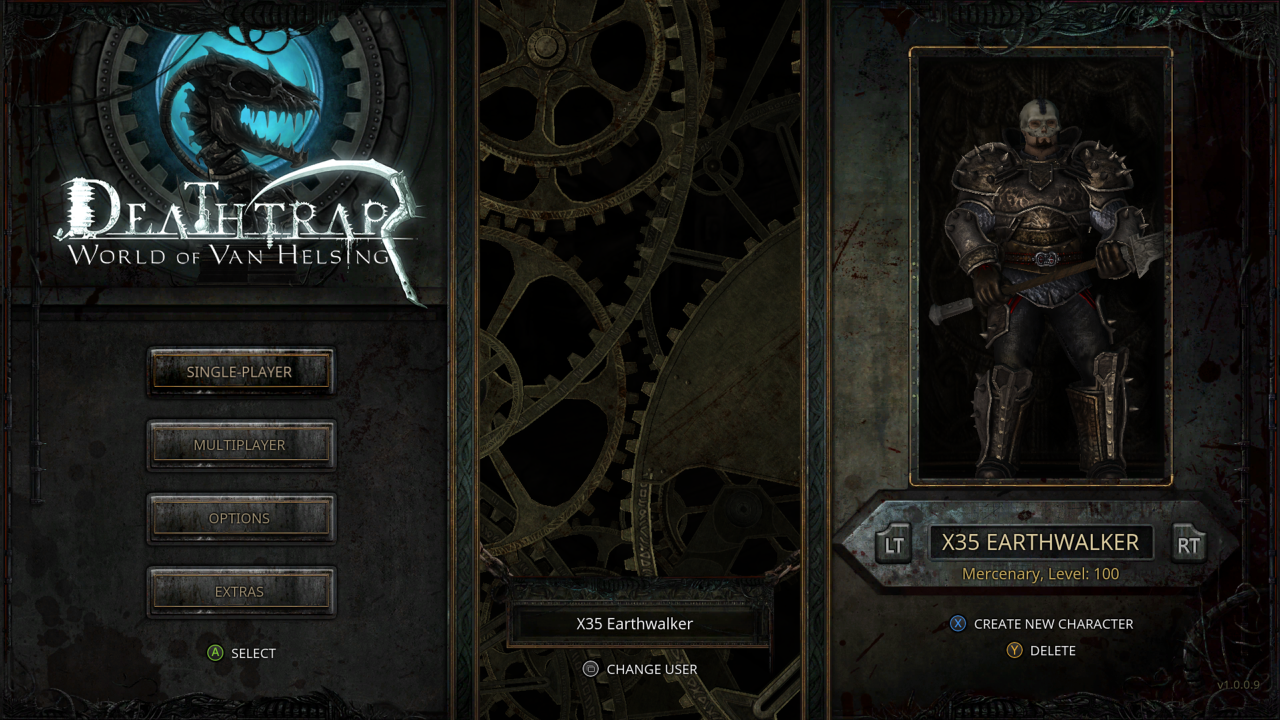
Firstly the main thing is what character class did you select, as this does effect almost everything. If you selected ‘Sorceress’ then know that you have the ability to attack multiple lanes at once and hit enemies hard from a distance with powerful magic attacks. If you selected ‘Mercenary’ then you can literally get up and personal with the hordes themselves and slow them down with brute force. If you selected ‘Marksman’ then you can get everywhere very easily with high mobility and gun down hordes at a distance keeping you safe. Now all three are powerful and useful in there own way. 

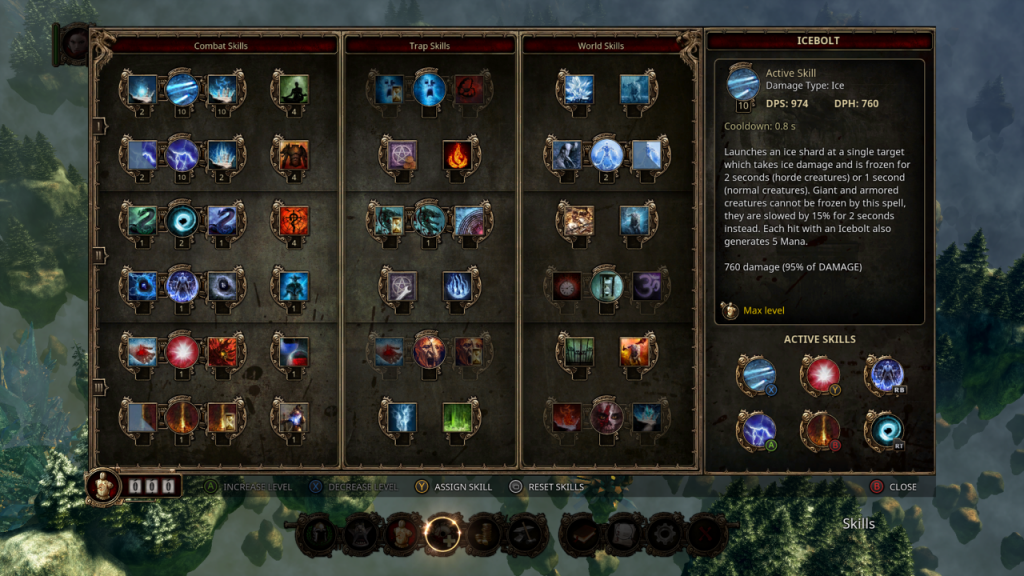
The Sorceress hits hard with the lightning attack and starts of with a cool icebolt ability that allows the player to freeze a certain enemy in place, a ice global ability (Icy wind) which inflicts ice damage on everything and a ability (Transmutation charm) to select a trap and whenever it kills, you get increased essence. The Sorceress is a major multi tasker. You can be lightning zapping multiple enemies at once, as your main attack has a spread and chain effect, while keeping one enemy temporarily in place with your ice projectile, gaining increased mana thanks to a well placed trap and attacking everything on the map at the same time with her global ability. That’s awesome. Never forget that the main fighters is the traps. You are just the deciding factor in these battles but you must rely on your traps. Keep your distance at all times as the Sorceress literally bruises easily. A few slaps and you have to get out of there but make sure to leave a lightning attack to their face as you do. Since she is 100% dependent on her mana, make sure to firstly, spend some upgrade points in ‘Meditation’ which increase maximum mana. Second make sure to upgrade her lightning ability, especially in ‘Surge of power’ and ‘Thunderbolt’ to reduce cost of attack, increase how long enemies are stun for, increase range of attack and increase the chance of an instant kill. ‘Frost mastery’ upgrade for Icy wind is essential as you can then keep hitting everything around the map more frequently meaning you are everywhere at once. The best defense you can have it to upgrade the ‘Chaos armour’ ability which has a chance of forming a bubble of invulnerability for 2 seconds whenever you have been hit but as a Sorceress you are practicing to not get up close at all so this is optional. Basically your job is hurt enemies from everywhere and multi task as much as possible.

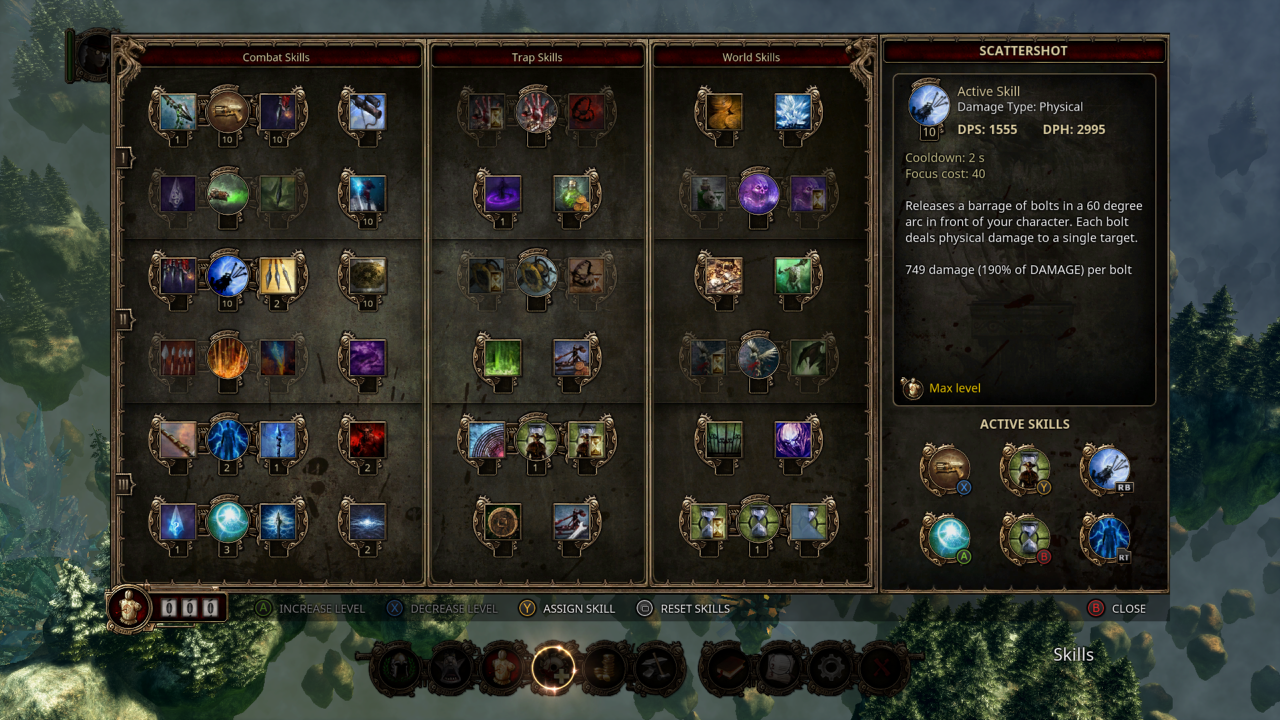
The Marksman is a long range fighter thanks to his two cross bows. He excels at effect damage, especially poison damage over time. Being a long range fighter and having low health (not as low as sorceress), means you have no reason to be near a monster. His main attack is ‘Shoot’ and you must spam this as much as possible. Do as much damage when you can. The ‘Poison streak’ ability which uses focus and allows you to launch a projectile that deals poison damage and poisons those enemies. ‘Essence trap sigil’ is the trap skill that makes all traps within 10 meters of the player generate more essence when they kill. Lastly ‘Domain of entropy’ is the world skill that causes all damage over time effects to deal increased damage. Straight away you can see that this character specialises in damage over time and poison. The Marksman relies heavily on traps at all times. He is more of a support role all the way. The very first thing to upgrade is your main means of attack, those cross bows. Invest some points in ‘Shoot’, ‘Splintering bolt’ and ‘poison bolt’. This will allow your Shoot attack to have AOE (area of effect) and poison damage which when upgraded makes a big difference. The marksman has a huge advantage over the other two classes. He has access to the ‘Mark of the craftsman’ passive ability straight away which reduces the construction cost of all traps. Make this one of your top priorities with upgrades. ‘Entropy Expertise’ is another top priority passive skill has it increases all damage over time effects of traps which is something this class specialises in. The game plan is to poison as much as you can with the ‘shoot’ and ‘poison streak’ and build traps that do damage over time effects and then activate ‘Domain of Entropy’ to bring intense suffering and death to everything that rises against you.

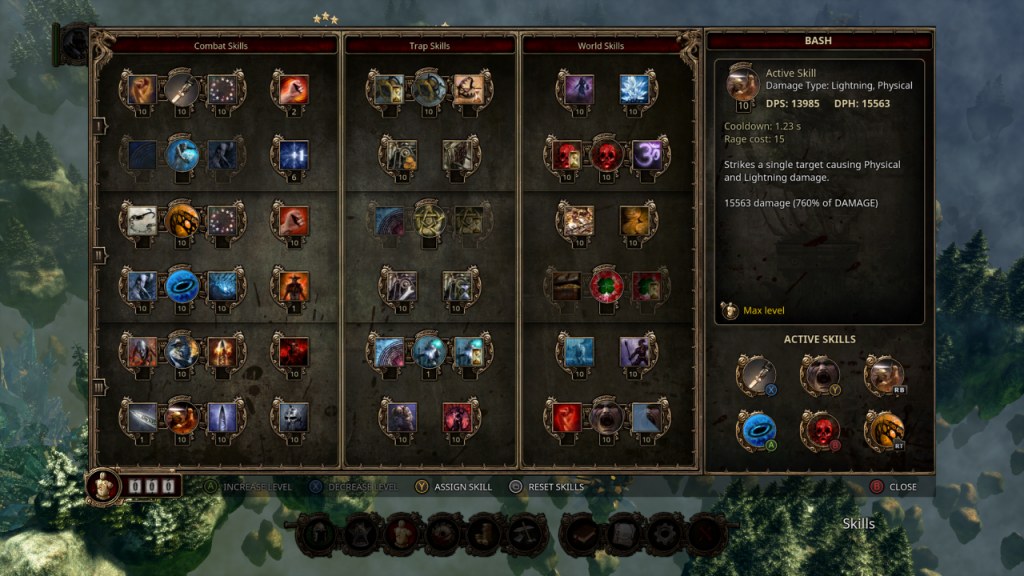
The ‘Mercenary’ is the big guy who ate all of his mum’s cooked foods to get strong. He battles it out it up close with the ‘Strike’ ability which is his main means of attack. It delivers heavy damage and grants rage with each hit. ‘Ghostly shape’ is an active ability that allows you to dash forwards at blinding speed, charging through all enemies dealing physical/ice damage. His trap boost active ability allows you to select a trap which then does significantly more damage for 8 seconds. ‘Touch of death’ is the world skill that afflicts all enemies with physical vulnerability for a short period of time. The ‘Mercenary’ has a huge advantage over the others, his health. He is a tank and therefore can use yourself to force your enemies to stand on certain traps, this is because when you are near enemies mostly stop moving and fight you. With that amount of health you won’t be dying any time soon and so they must stay on continuous damage traps. Firstly you must invest upgrade points in your main attack, so ‘Strike’ and ‘Paralyzing assault’ which makes your strikes have area of effect and a chance to stun enemies. You may next need to focus on ‘Touch of death’ to increase the damage that all physical attacks from both you and traps do to all enemies everywhere. Don’t invest upgrade points in ‘Ghastly shape’ as it tends to take you away from enemies which isn’t what the Mercenary is about, although it is very useful to use until replaced as you can use it to increase your mobility. Use it to catch up to certain monster who are trying to make a run for it or traverse the map like no other (keep an eye on your rage meter though. The strategy with the Mercenary is simple. Get up in everythings face and beat it in with ‘Strike’ but when things get activate ‘Touch of death’ and then select a physical damaging trap with ‘Trap boost’. It’s a devastating combination. Therefore it is rise to invest upgrade points in ‘Mechanical mayhem analysis’ which increases the amount of experience points you get from each mechanical trap kill.

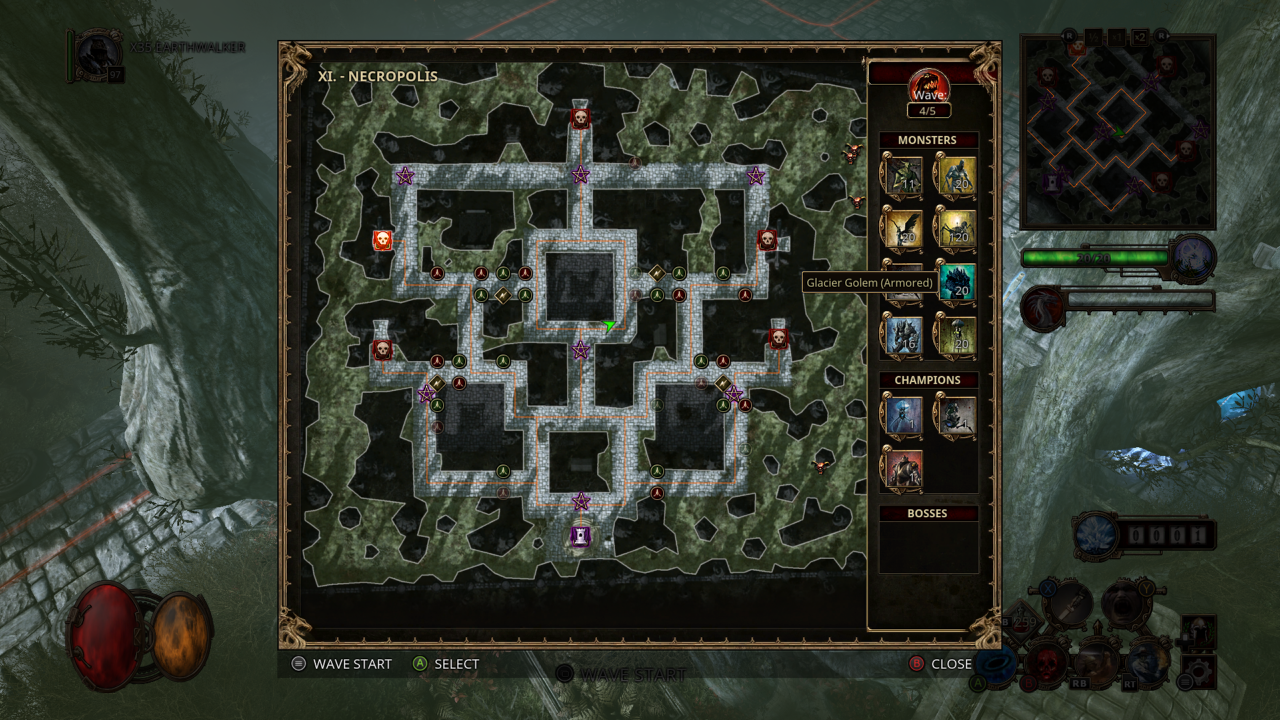
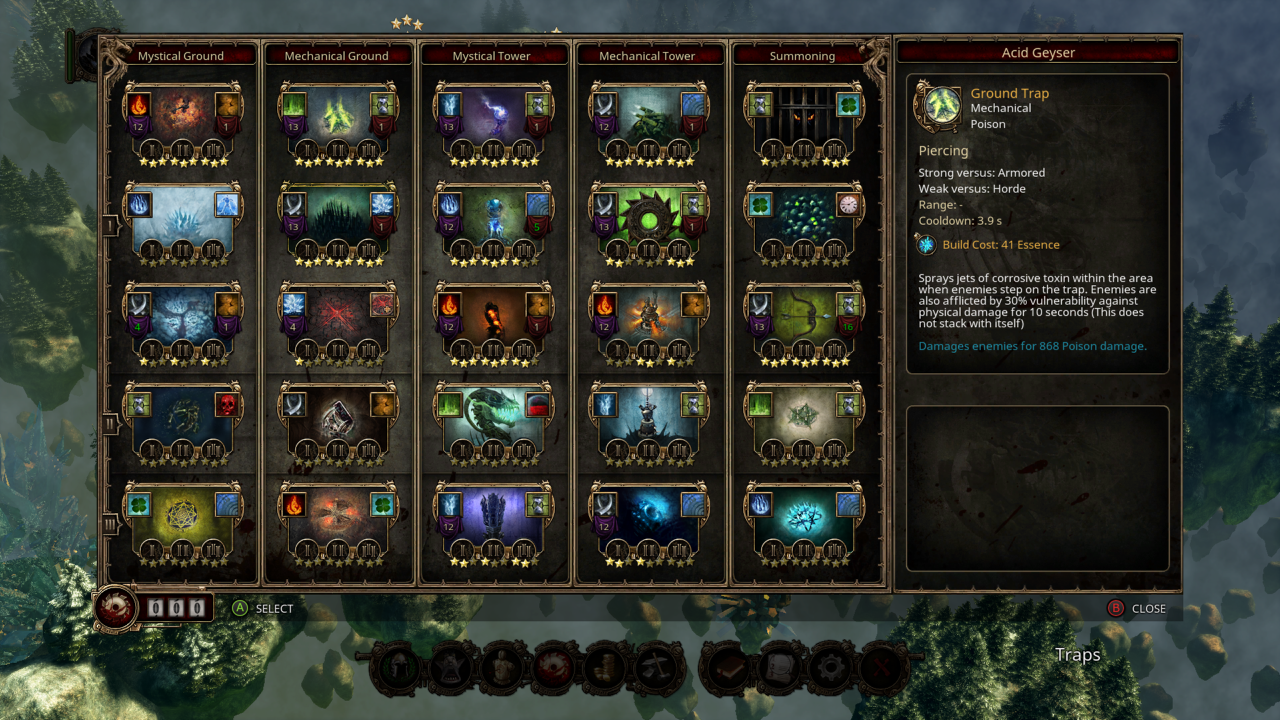
Now the traps are the main thing about this game indeed. There are so many traps, we heard there are 25. Now knowing where to put these traps and when is so important. Never forget that no trap is completely useless but some traps are definitely better than others. Check out your traps map selection screen. You will notice that the traps have to be unlocked by fulfilling certain conditions. Traps are split into 5 categories: Mystical ground, Mechanical ground, Mystical tower, Mechanical tower and summoning. Throughout the level are spots, marked, showing what type of tower can be built there so it pays to look at the map first before building to know where to put certain traps. Mechanical traps tend to do mostly physical damage but some do both physical and other element damage like the ‘Razor launcher’. Traps also have types of enemies that they are stronger or weaker against. For example the ‘Spear trap’ is effective against armoured enemies but weak versus horde enemies, this is because of the type of tower. That’s right the traps also have types. The towers are also split into types like: Concentrated, Piercing, Splash and nothing. Concentrated are good against ‘Giant’ enemies but weak against ‘armoured’. Piercing is good against ‘Armoured’ but weak against ‘Horde’. Splash is good against ‘Horde’ but weak against ”Giant’. Type-less traps are just general and work equally with all enemies. So you literally should check out and know each trap, what they are good against, when to use them and the upgrades they can get.

Regardless of what character you are, the ‘Gun sentry’ should be your all round traps that you can always rely on. They hit everything and deal great damage with very good range. Once upgraded they have area of effect and can slow down enemies. Best to use these in groups as that’s when they start to really shred enemies. This trap however can be truly power with the mercenary because if you build multiple in an area, they can deal focused physical damage on a certain enemy then the player can use trap boost to enhance the damage of one of them and also activate ‘Touch of death’ making the enemies receive more damage from physical attacks then lastly combine with your ‘Strike ability’. Trust us, nothing survives that. Not even bosses. The ‘Lightning pillar’ has terrible first impression as initially you would think it’s rubbish but once upgraded, it becomes a very effective trap. Always invest upgrade points in ‘Multi jolt’ and ‘Extra charge’ allowing the trap to have more charges to fire and the chance to hit multiple enemies at once. The ‘Acid geyser’ excellent with both the ‘Mercenary and ‘Marksman’ but better with the latter due to special abilities. The ‘Acid geyser’ deals poison damage to whatever enemy stands on it but once upgraded it can also poison enemies and deal damage over time. Best of all this trap also afflicts enemies with 30% vulnerability against physical attacks. This means that enemies struck by the ‘Mercenary’ and hot by the ‘Marksman’ will receive increased damage but since it does poison and damage over time the active abilities of the Marksman like ‘Domain of Entropy’ will increase the damage to it’s full potential. 

The enemies don’t require that much detailed talk because if you know your traps well and strategically place them, then regardless of the enemy you will most of the time come out on top. Enemies are also split into factions, types and classes (Not sure if those are the right names though). The factions are: undead, mechanical and mythical. what faction you will face is only dependent on the location of the level. No in game differences. The types are: Normal, giant, armoured and horde. The types you should be aware of already because of the traps and what their strengths and weaknesses are. If you remember the traps well then enemy types aren’t a problem. Giants are weak against concentrated because concentrated traps never leave their target until out of range and they are normally slow moving. Piercing traps are good against armoured because they have the ability to do regular damage through armour while others are reduced damage. Splash damage are good against horde because they can harm multiple enemies at once. Makes sense. Off course all enemies will be harmed and killed by any trap but some are effect only due to logical reasons. The classes are (first two aren’t official names): regular, champions and bosses. For example the ‘Lesovik’ is a simple enemy with 1100 health, damage is 145 and has the simple fire bolt ability which launches a bolt of fire at you. The ‘Lesovik champion’ has 14000 health, damage is 200 and does more damage to your gate. The ‘Forest demon’ is a bigger step up from the champion version and is a boss with 28000 health, damage is 250, does more damage to your gate and has the ability to summon other smaller monsters to rush for your gate. There are more powerful monsters like these.

The simple recipe for this game is to know your style and how to adapt it to the many situations you will find yourself in. Before you start a level check the map to see what enemies are coming and where they are coming from as that might just save your life. Wisely upgrade your character and focus more on skills that you need and suit what your character can really do. While playing keep your other eye on the mini map to keep track of what’s going on as some enemies will try to sneak past you into your gate. Don’t try to upgrade all traps. Only upgrade what you use and what you need. Better to have some powerful traps then many weak traps that can’t keep up with the enemies. Don’t worry if you upgraded wrong as there is an awesome feature to get back your upgrade points. Buy and craft the best items for your character. If you are playing with a friend then communicate at all times and use your abilities to the best. Last of all, it’s just a game so take it easy and have some fun while slaughtering monsters. Now get out there are save the world. 

For more information check out the link below:

More information


World of Van Helsing: Deathtrap is a tower-defense action RPG game that deserves to be played. This game was developed by ‘Neocoregames’. If you like RPG games and quite a strategic gamer then this game is for you. This game is just like dungeon defenders but less cartoony and more monsters and ghouls and stuff. X35 Earthwalker has recently been playing this game and so far he has mainly good things to say about it.

You start the game with a lengthy video explaining pretty much everything you initially need to know about the game. Then you get to select the type of character you want to play as: sorcerer, mercenary or marksman. Basically do you want to be a spell caster, close range fighter or a long range marksman. The spell caster can do very effective magic attacks and damage at mid range but weak up close due to low health. The mercenary gets right up in the fight and stands toe to toe with the hordes themselves. The marksman strikes from a distance away and inflicts poison damage. It comes down to your style of play. The good thing is that you can have multiple characters and play them whenever you want.

In this game the main and only way to win this game is by the towers and traps you build; however the towers are 70% because the rest comes down to how you play your character thus the combination of tower and RPG. Each level will have red lines showing you where the enemies will be coming from for that wave and the path they will take. How you build and when you build is important here because there are different types of enemies like: horde, armour, giant and more. Certain enemy types are weaker against certain types of towers and this does matter. Certain enemies are close range attackers while others are long range and the player needs to take note of this for future encounters when the levels start to challenge you way more.

The type of traps there are: Mystical ground, Mechanical ground, Mystical tower, Mechanical tower and Summoning. Ground traps are placed on the… well… ground and trigger when an enemy steps on it. Towers can only be built on the altar looking things and summons can also be built on the ground. The game has we believe 25 different traps in this game which is really large for a tower game. So far none of these towers come off as useless. Each one is definitely situational and the player must know when to build each one. Mystical ground like the lava grill are incredibly effective when you can keep the enemies piling up and staying on top of it. Mech ground traps like the spear trap are best to heavily weakened that one enemy that take time to die. Honestly X35 Earthwalker isn’t a fan of the mystical lightning tower but it’s good for helping your character in focusing on that one annoying enemy. The mech gun sentry tower is the trap that you must always have as that all round one that you can rely on. Summon traps like the monster cage are perfect for stalling for time and holding up the enemy allowing you to be in two places at once.

Each level has a boss in the last wave who deserves your attention. Make sure you know what boss is coming your way or you WILL get a nasty surprise. Some bosses can summon the monsters while some spam monster summoning. Other bosses shield enemies and more effects. What we so like about this game is the variety. So many different enemies, so many different traps and so many different bosses. It gets better, the game has even a monster encyclopedia so you can know everything about each one and the encyclopedia is available during levels so no nasty surprises for players. Some levels have enemies which are marked on the map and stay in ghost form. They stop being ghosts only during a wave and that’s your only chance to fight them. When you beat them, some drop keys that you use at the end of the level to unlock extra rewards and items so they are worth beating but since it’s during a wave the enemies may sneak past  and destroy your gate so timing is everything.

The best thing about this came is that there is co-op. X35 Earthwalker has played with Diamondz L45 and it’s literally just a better experience. This game was meant for team work though as you can have 3 of your friends join in the action to help you defend the gates from the hordes of monstrosities. The game has a simple to understand but good equipment system where you can equip armour, helmets, weapons and other items to improve your character. There are multiple different items and even a goblin like creature that other s’great offers’ that’s available for a limited amount of time. Those great offer items are normally good and always worth checking out. You can tell you need to spend time of this game because the upgrade section has so many upgrades available with passive upgrades and active upgrades for your traps and your character. You get points to upgrade from completing levels and more with better performances.

The graphics, design and attention to details on characters, levels and effects are done very well. The animations of the characters and monsters are constant and flow very well. A lot of effort went into this game and we appreciate that. X35 Earthwalker gave this game a chance because he knows how hard it is and how much is spent into making games and so he tries them out. This game is really good and we will get into it. ‘Neocoregames’ you did a great job with this game and we hope to see more for this game.

 For more information check out the link below: